
This months Sunday game (held on 1st April) saw the club re-fighting the Battle of Lutzen – the 1st major battle of the 1813 German Campaign.
The following is a brief After Action Report – words and pictures by Ross.
The battle started at 11:20am with the Prussian I Korps, under the command of Gebhard von Blücher (John), advancing at speed toward the towns of Gross-Gorschen & Rahna. The lead units of Bluchers command had complete surprise and caught Souham’s Division at rest in the fields around the two villages.
Warning shots were fired, bugles sounded, and the French stood to arms as their comrades poured into the villages to defend against the onslaught.

Despite the lack of time for the French units to garrison the villages they had newly occupied, the Prussians were held up with only the partial loss of Gross-Gorschen. This initial setback did not last long however and soon the defenders of Gross-Gorschen were forced out of the village and overrun by the Prussian cavalry waiting on the flank along with their Horse Artillery.

This dogged defense by the vastly outnumbered French allowed Marshal Ney to bring up the remainder of his III Corps in time to stop the Prussians completely overrunning Rahna, Klein Gorschen & Raja.

Over the next 4 hours the villages of Klein-Gorschen and Rahna exchanged hands several times in a maelstrom of charge and counter-charge as both commanders threw in fresh forces in an attempt to defeat the other.
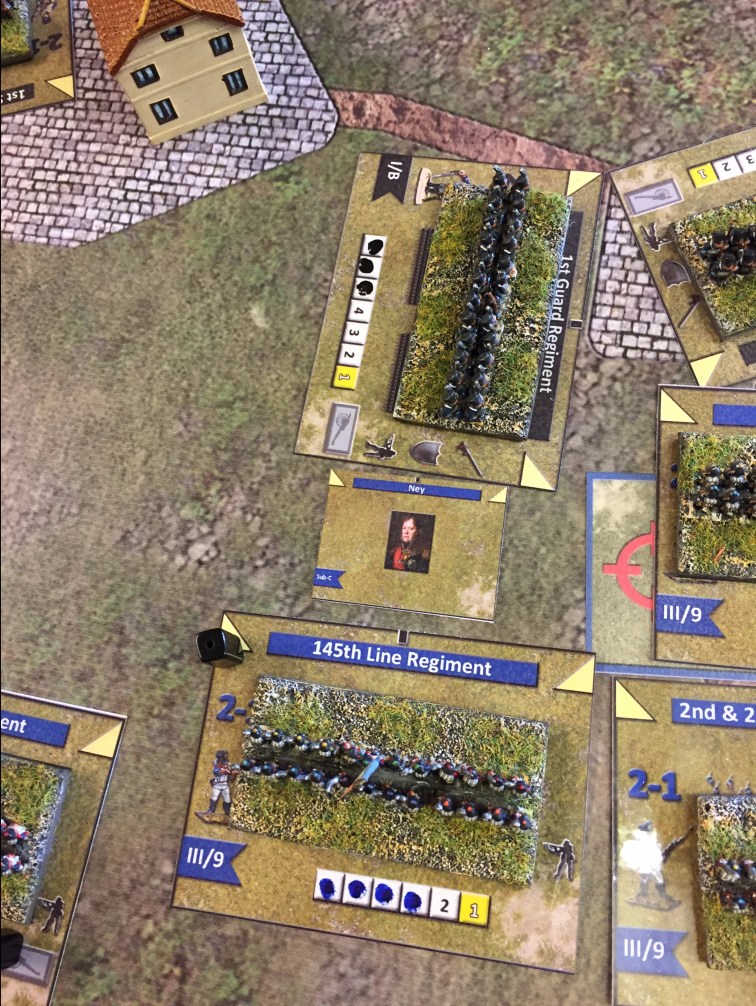
During one of the many melee’s Marshal Ney, while leading his men from the front, was struck by a lucky musket shot and killed outright (Ross threw a 6 for the “at-risk” roll and then a 5 on the “wounded/killed” roll). Seeing this, his men fell back in disarray and panic (The French 145th Line Regt. rolled 5x dice in close-combat and achieved “1x success” while the defending Prussian 1st Guard Regt. rolled “2x successes” on 6x dice after having to re-roll for being flanked).
Just as the remaining troops of the hard pressed III Corps were beginning to crack the Emperor Napoleon (Ross) arrived on the field with the Guard. The Young Guard were thrown in against the Prussians just as they broke through and managed to blunt this last ditch effort to capture the objective villages.

With this the battle closed with the Prussians holding 3 of the 4 objectives as darkness fell. It was a close run thing!

Whilst the main battle raged around the four villages, the Prussian and Russian Cavalry Reserve (under von Wintzingerode – Mike) on the Allied left flank kept the French VI Corps (under Marmont) and the IV Corps (under Bertrand) at bay – with neither Corps playing much part in the battle.

However without the support of infantry they were unable to threaten the French hold on the villages of Starsiedel and Kolzen and resigned to bombard the prepared French brigades with their Horse Artillery causing numerous casualties (although they did manage to charge and overrun an Marine Artillery Brigade with Hussars supported by Cossacks before it could form square).
In the centre, several cavalry charges flowed back and forth toward the end of the battle after the French Guard Cavalry arrived. However due to “over-confident handling” by Marshal Bessières the Guard Horse artillery were overrun and the Polish Lancers & the Grenadiers à Cheval received a rather bloody nose at the hands of the Russian light cavalry.

At the end of the battle the French had lost 13 units and 3 of the 4 objective villages – while technically a French victory, it came a big cost (many remaining units only had 1 or 2 elan points left).
The Prussians lost only one unit but had several very weak units that they managed to pull back from the fighting (although not from the field). It was generally agreed that another turn or two would have seen the French defeated with the loss of the 4th objective village).
All in all another excellent game of “Blucher” for the club. Looking forward to the Battle of Bautzen that we have planned for next month!
Best regards,
OWG

excellent report, thanks for writing it up. Blucher just works so well in 6mm yeah ?
You apparently use the full card templates with minis in the centre. Nice idea. Reduces the model count dramatically.
Stuart,
Thanks for the message. We find that 6mm is perfect for Blucher (especially when used with the cards). The cards we use are 80x60mm and were designed to fit the 60x20mm bases we use for our figures and still allow all the details to be read from the card.
As you say it keeps the model count down to manageable size especially for the larger battles. In fact we now have the entire armies for Leipzig using this method and we plan to tackle that (along with the rest of the 1813 German Campaign battles) later this year.
Best regards,
Ross @ OWG
Very Enjoyable. I am looking at doing this in 28mm, but using Divisions as a base. This would allow for a reasonable number of figures and yet still be manageable. If it proceeds, I will take pics and display on my FB page.
Michael,
Thanks, we’d love to see some pics of 28mm figures being used with the rules. Should be relatively easy to combine the brigades to make divisions and still get a fairly historical game I would have thought.
Looking forward to a write up if you do play the scenario.
Best regards,
OWG
May I ask – what make are the buildings you use for terrain?
Hi Markus,
The buildings are from Timecast
http://www.timecastmodels.co.uk/buildings_catalogue/6mm_catalogue.html
Can I ask what size bases you use. At our club W. A. R. (Wargames Association of Reading) we use 60x30mm bases. We use the last 5mm of the base with the unit stats. In this waywe do not need to put down the cards underneath the units. Also for deployment we use the nations flag of the period on 60x30mm blanks with the Regiment/unit name on the reverse. We All have different ways of doing things and we find this works well for us. Hope this gives some food for thought.
Colin
Colin,
Thanks for the message. We use 80×60 cards and then place the 60×30 figure based on top.
This allows all the information on the cards can be seen clearly around the figure bases and the grass texture on the cards matches the banners we use for our playing surface (it’s the same background) so they blend in very well with the scenery.
Best regards,
Ross
Hello everybody. Nice report. I’d like to know how the terrain is made. Looks the same as the briefing maps in the scenario sectoon.
Nice to look at, and effective.
Thx, Hugo
Hi Hugo,
The maps in the scenario briefing are actually drawn at full scale which allows us to send the files to a printer and have them made for us.
The company prints commercial banners for advertising.
https://www.essexbanners.com/product/pvc-banners/
Best regards,
Ross
Great AAR and love the ‘bespoke’ battle mat even if no trees 🙂